
Your electric smoker is an investment, so it makes sense to want to take the best care of it, so it will last as long as you need it. It can take a bit of effort to find the best electric smokers, but once you do you’ll be able to create delicious food. However, we often forget to clean such devices, think it will be more hassle than it is worth. Don’t despair as we have all the steps and information you need to learn how to clean an electric smoker. Take a look at our list of tools and steps. It’s important to read through the article before you get started so that you don’t find yourself stuck in the middle. And just remember: all your hard work will pay off and at the end of this effort you’ll get to enjoy even tastier food!
Before you get started cleaning your electric grill, make sure you have all the tools necessary. Here is a simple list of what you’ll need:
Ok, before you start to panic, realize that there is a reason you want to clean your smoker. All of the juices and grit from your smoking session can not only impair the taste of future food but create unnecessary wear and tear on your smoker. Remember that the better you keep your smoker, the longer you get to use it.
With that in mind, how often to clean an electric smoker is after every use. Yes, that’s right: every time. The good news is that after you clean your smoker the first time, subsequent times become easier. You will get to understand the procedures and know just how long it will take.
Speaking of time, be sure to start when you have a free afternoon. You don’t have to clean your smoker right after you use it. After all, you’ll probably want to enjoy the food you’ve produced, so it’s ok to take the rest of the day off for enjoyment. However, the sooner you get to cleaning, the easier it will be as well as the less you will have to worry about it.
We’ve put together a thorough list of steps for cleaning an electric smoker. Some take more time than others but all are necessary.
First things first, let your electric smoker cool down. You don’t want to burn yourself and cause undue stress. Letting your smoker cool down is perhaps the easiest step. To keep yourself occupied while you wait, why not try some of the food you’ve just smoked. Besides, it’s always easier to work on a full stomach.
The one really nice thing about an electric smoker is that they don’t get too hot. On average, your electric smoker won’t reach temperatures above 300 degrees Fahrenheit, so the cooling time will only be about an hour.
The one exception to this step is if you haven’t actually used your smoker in a while. Perhaps you’ve forgotten or you’re finally getting around to a thorough cleaning from last summer. In this case, turn your electric smoker up to its full temperature before then turning it off.
The reason for this is that it is easier to clean an electric smoker after it has been used. There will most likely be food debris and the high temperature can soften the food, making it easier to remove.
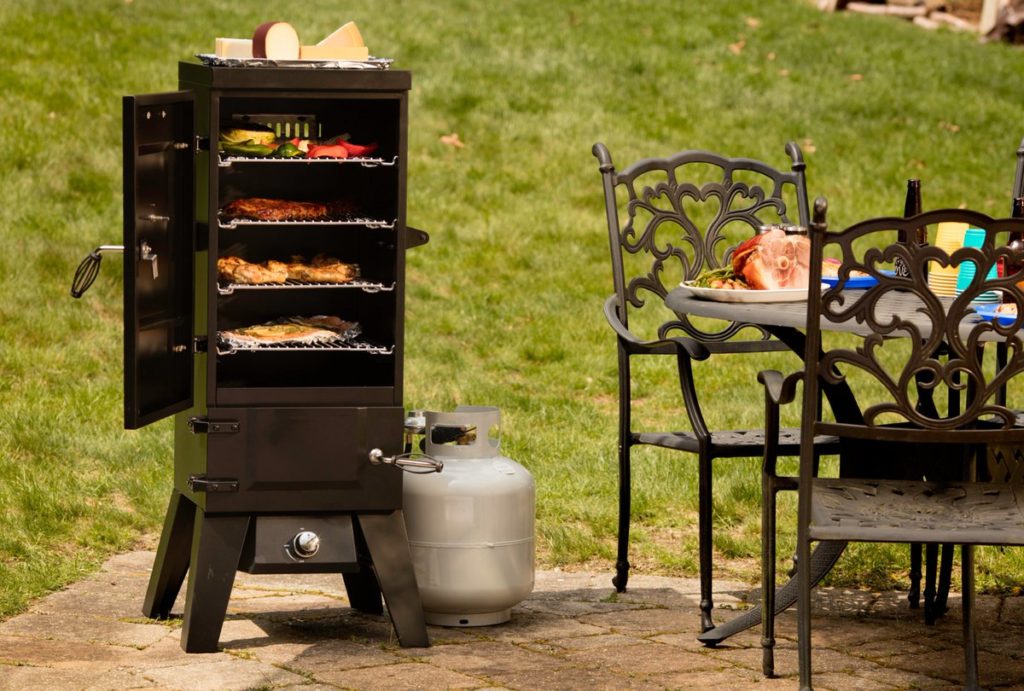
Each electric smoker will have an ash box. This is where you place the wood chips when you want a smoky, tasty flavor for your food. As the wood burns, it creates ash which then needs to be removed. This step should be easy. If the ash is cold, you can place it in a garbage can. If the ash is warm, either wait for it to cool or place it in a non-combustible container. Furthermore, if you have a compost bin, wood ash is a welcome ingredient.
After the ash box has been empty, give it a quick wipe with a damp cloth.
 Inside your electric smoker, you will find many removable parts, including racks, a water pan, and a drip tray. Take all of these parts out first.
You should already have a few bins or buckets of warm soapy water. If you’re outside, you can even have a hose on hand.
Start by cleaning off any large pieces of debris. A stainless-steel grill brush, such as this one from Grillart, will protect your racks while also easily removing the gunky mess on them. The less effort you have to put into cleaning, the better.
Then, place the parts in the bins of soapy water so they can soak. If you don’t have room outside, you can bring these parts inside to the kitchen sink.
Depending on how much debris is stuck on, you can leave the racks and trays to soak for a while. Once it looks like the job won’t be too difficult, you can take a cloth and start cleaning. You may have to change the water a few times if it becomes too greasy. After all your trays and racks are clean, leave them to air dry, either on a drying rack or on a clean towel.
Arguably the easier part of cleaning an electric smoker is the removable parts. However, the interior needs to be cleaned, too.
If you can, place your electric smoker on a tarp or blanket so you can catch all the debris from inside the smoker. This means you won’t have to worry about stepping on gristle later as you walk across the grass.
Use a plastic scraper to gently remove the larger debris inside the smoker. You can also use a soft-bristle brush to sweep everything out. Don’t use a grill brush in this step as the bristles are too hard and may damage the inside of your smoker.
You want to get all the corners of your smoker, so get down and reach into any hiding spots. Then, sweep everything onto the tarp on the ground.
Once the debris is out of the smoker, you can go ahead and start scrubbing. Take a sponge or cloth and dip it in warm, soapy water. You don’t want t to be soaking wet, so squeeze out some of the water. Then, start scrubbing.
Start at the top so anything dirty falls down. Don’t forget the ceiling of your smoker. While the first uses of your electric smoker won’t discolor the walls, the more you use it, the darker they will naturally become. The purpose of this step isn’t to get your walls back to the color they were when you first bought the smoker. Rather, it’s to clean and sanitize everything.
Once everything looks clean, you can move onto the glass door. You don’t have to worry about drying the inside with a towel as it will air-dry during the process.

Unfortunately, how to clean glass on an electric smoker is a common conundrum. It can be a hard, tedious task, especially if it is not performed regularly. You can definitely use a combination of soapy water and elbow power. Or, if your smoker door looks too daunting, you can try a specialized cleaner. Electric smoker glass doors are similar to oven glass doors, so if you’re really struggling, there are a few tips Trusted Source How To: Clean Oven Window Glass - Bob Vila The inside of your oven may be spic and span, but for a clean kitchen and the benefit of your hardworking appliance, don’t ignore the oven window. Grease-splattered though it may be, you can restore the glass to spotless condition. Here’s how. www.bobvila.com to check out.
After you have scrubbed your best, rinse the glass door and let it dry on its own.
While cleaning the inside of your electric smoker is important to remove food debris and grease, the outside should not be overlooked. Because your electric smoker is housed outside, dirt and dust can easily accumulate.
Start with a clean, soapy cloth and gently wipe down all the sides. Don’t forget about the top of the smoker as well as the back. Get into all the tiny areas, such as around the door hinges, around the legs of the smoker, and the seal of the door.
 Without a thermometer, your meat won’t be cooked properly. Keeping this tool clean is essential. However, for such a small instrument, it can be hard to properly clean it.
The problem with a thermometer is that the glass can become cloudy and hard to see through. Start by scrubbing it with a cloth and soapy water. If this doesn’t help, you can use a glass cleaner.
You may find this isn’t enough, however. You can also try using a razor blad to scrape the smoke off the glass. Just be careful you don’t end up scraping and damaging the glass.
If your thermometer just won’t become clean, then you may have to purchase a new one. Thanfully, they are relatively inexpensive.
 Once your racks are clean, there is an important step not to be forgotten. Your smoker racks need to be oiled with vegetable. This serves two purposes.
First, the oil prevents rust, ensuring that you don’t have to replace the racks anytime soon. Rust can wreak havoc with your food, even altering the taste.
Second, oil works to prevent future food from sticking. After working hard to clean all the debris from your racks, you won’t forget such a step that will make cleaning easier in the future.
The best way to dry an electric smoker is by keeping the door open and letting it air dry. However, if you notice a lot of water leftover from cleaning, you can use paper towels or even old newspapers. Give a thorough drying, particularly in the corners. Then, let everything stand for a few hours.
Before you put everything back together, let the racks and pans dry properly. Again, you can use paper towels to wipe off excess water.
Never put anything back in your electric smoker until it is completely dry. Otherwise, mold can easily grow which is a challenge to clean on its own.
 It can take a couple of hours for everything to properly dry. Don’t rush the process. This is one reason why you want to give yourself plenty of time to get the job done.
When everything is dry, you can then put the racks and pans inside.
Despite our best intentions, there is always a chance that mold can develop inside a smoker. So how to you clean an electric smoker with mold? Thankfully, there is an easy solution.
Mold thrives on warm, damp environments Trusted Source Mold - Wikipedia Molds cause biodegradation of natural materials, which can be unwanted when it becomes food spoilage or damage to property. They also play important roles in biotechnology and food science in the production of various pigments, foods, beverages, antibiotics, pharmaceuticals and enzymes.[9] Some diseases of animals and humans can be caused by certain molds: disease may result from allergic sensitivity to mold spores, from growth of pathogenic molds within the body, or from the effects of ingested or inhaled toxic compounds (mycotoxins) produced by molds. en.wikipedia.org . The best way to eliminate mold is to change this environment. Boil water in a pot or kettle. Pour it into a microwave-safe bowl and then place it inside your smoker. Turn your electric smoker to the maximum temperature and keep it on high for one hour.
The hot temperature will be too much for the mold, which will then be burned away.
After an hour, turn off your electric smoker and let it cool. Once you can touch the insides, you can go ahead and clean the entire smoker. Follow the steps we’ve laid out and you’ll be golden.
Cleaning an electric smoker is not a pleasant task, which is why it is sometimes put off. However, it is necessary and will result in much better-tasting food as well as more longevity on your smoker. When you get into the habit of cleaning your smoker after every use, it becomes routine. We hope we’ve explained how to clean an electric smoker so that you can get down to the task. Once you get started, you’ll realize that the cleaning doesn’t take as long as you once thought. Furthermore, there’s a nice satisfaction seeing a clean electric smoker. And, it may just inspire you to plan your next smoking adventure.